I am so excited that my favorite time of the year is just around the corner!
I {heart} fall and everything is brings with it....cooler weather, football, pumpkin EVERYTHING, Halloween {my most favorite holiday}, apple cider, family time, and on and on!
I got the fall bug the other day and was ready to start decorating. The first thing that came to mind? A new fall wreath!
Okay, so this is not a new idea by any means. But I just LOVE the cute little words she added using her Cameo! I most definitely have added this little gizmo to my wishlist :)
So we all probably say some version of this rhyme with our littles. Personally, I always used the "...and you don't pitch a fit!" Living in the south, 'get' and 'fit' rhyme just perfectly :)
However, I love Holly's version so much more! And these are free, my friends!
I wasn't sure if we were going to be able to pull this off, but I was definitely willing to give it a go!
I enlisted the help of my mom, aka queen of crafty, and we got busy!
First, we gathered all the supplies...
*paint (2 different colors)
*painter's tape (I used a 3 in. Scotch painter's tape)
*measuring stick
*pencil
*rollers
*chalk line tool
I painted the whole room a light gray color that matched our duvet perfectly. I chose a slightly darker shade of gray for the stripes. No, I didn't go all fifty shades..... :)
My mom did all the measuring for me. Here is how the wall looked after we painted it the light gray.
Here are the basics when painting chevron stripes. The distance between peak to peak and crest to crest should be the same. The crest should be exactly midway between the two peaks of each stripe. Does this make any sense? This is a video that we watched before hand, and it does a much better job of explaining...
Much better, right?
Okay, so next we decided to snap a chalk line to help us measure out the points. It's kinda hard to tell in these pictures, but that light blue line is the chalk.
We used some tool that my folks had...it looks like this.
Now comes the hard part! Using your painter's tape, tape off each stripe so that the tape is in the inside of the base color. If you take a close look at my stripes, it looks like they are not even, right? But trust me...it works out in the end.
Remember that it doesn't have to be perfect :) Imperfection is what makes it unique!
After you have your stripes taped off, go back over the edges and make sure they are pressed down really good. The video even suggests using the base paint to seal in the edges.
Then paint your stripes! This was the fun part :) We put about 2 coats of paint on each stripe, then let them dry for a few hours.
And here are the final results!
I love, love, LOVE my chevron wall! I think it turned out amazing, and it looks just perfect with our bedding! Now our bedroom is all kinds of romantic :)
I still have some styling to finish in there, but I was dying to share this with you guys.
Do you guys have BIG plans for the 4th of July? I sure hope so!
My whole family will be in Gatlinburg, TN for their annual parade, and then we will probably watch fireworks from the hot tub at our cabin :) Last time we were there over the 4th, our cabin was so high up that we were actually looking down at the fireworks!
Speaking of, if any of you are close to Gatlinburg and want to meet up, we are having a bloggy meet up on the 5th!
Soooo....since most of us our knee-deep in summer, and school is the furthest thing from our mind (ha!), I decided to dedicate my 4th of July pins to my most favorite thing....food! :)
These were the first thing that caught my eye..aren't they awesome?!?!
This one is from my absolute favorite recipe blog....Skinnytaste! If you've never head of it, you have got to check it out. Gina has some amazing stuff on there!
Courtesy of Skinnytase
Oooooh....and what about these cookies???
Totally simple! And talk about yum!
Last, I wanted to share a little something with you guys. Stay with me now...
These are some strawberry shortcake jars I made for my parents at the end of the school year.
They had a cute little tag that said "We would have come up SHORT without you!"
Now, I thought this would also be perfect for the 4th! I mean, who doesn't love strawberry shortcake in the summertime???
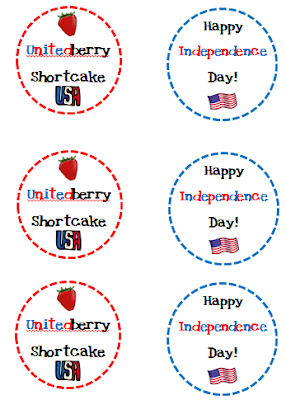
So I whipped up some tags that you could use with these :)
Click on the picture to download!
One goes on top and one can be tied to the front :)
I wanted to share a post with you guys that I orignally wrote for April. I thought you guys might enjoy it, too!
How many of you have pinned the crayon wreaths?
It was one of the first things I pinned, and I desparately wanted to make one! So....I did!
It was really easy. Here are the materials needed:
*Crayons (I used a 64 pack of Crayolas)
*Hot glue
*2 different sized embroidery hoops. I can't remember the exact sizes I bought, but it doesn't really matter. You just need 2 different sized hoops, where one can fit inside the other.
1. Put the smaller hoop inside the larger hoop. Keep the spacing the same all the way around the hoop. I painted both of my hoops white, but you could definitely keep it the natural wood color.
2. Arrange the crayons on the hoop...have fun with it! I put mine all with the label facing up and did all the colors, but you could totally just pick your favorite colors or do some type of pattern.
3. Start gluing! Glue one crayon at a time, so that you can keep your spacing somewhat even. Also, don't use too much glue, or it will just melt the wax.
4. Wrap the ribbon around a couple of crayons at the top and glue.
5. Paint the wooden letters however you like, and glue them on.
Simple, right? I made these as gifts for a couple of teachers, and I love the way they turned out!
I used letters to represent their last names, and I found those little wooden apple cutouts at Hobby Lobby. I just painted them, then wrote their names inside with a sharpie.
Hope you guys are inspired to go make your own! I probably spent less than $20 on the materials for all 3 wreaths, so it was pretty inexpensive to make!
When you get a second, come on over and check out my blog :)